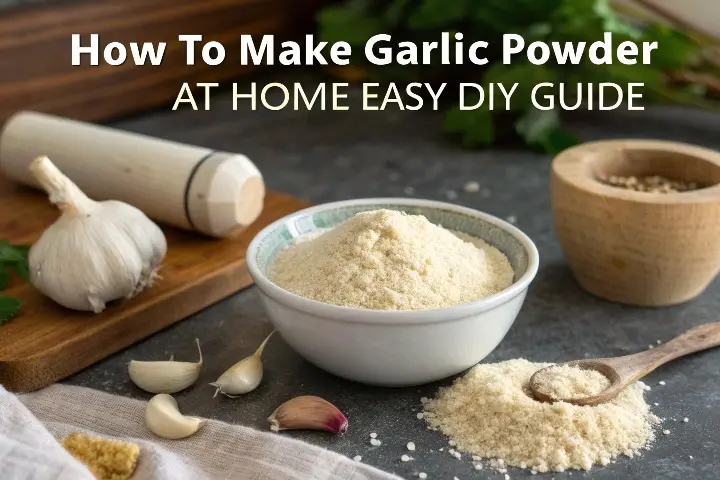
Garlic powder is a must-have in every kitchen. It adds deep, rich flavor to dishes without the hassle of peeling and chopping fresh garlic. But did you know that making your own garlic powder is easy, cheaper, and tastes way better than store-bought versions?
In this complete guide, you’ll learn:
✅ Step-by-step instructions (with pictures if needed)
✅ Oven vs. dehydrator methods (which is better?)
✅ Pro tips for the best flavor
✅ Common mistakes to avoid
✅ How to store garlic powder so it lasts longer
✅ Creative ways to use it in cooking
By the end, you’ll never buy garlic powder again!
Why Make Your Own Garlic Powder?
Before we jump into the process, let’s talk about why homemade garlic powder is worth the effort:
1. No Additives or Preservatives
Store-bought garlic powder often contains anti-caking agents (like silicon dioxide) to prevent clumping. When you make it yourself, you control what goes in—just 100% pure garlic.
2. More Flavorful
Freshly dried garlic has a stronger, richer taste than pre-packaged powder, which loses potency over time.
3. Saves Money
Buying garlic in bulk and turning it into powder is much cheaper than small spice jars.
4. Reduces Food Waste
Got extra garlic that’s starting to sprout? Instead of throwing it away, turn it into powder!
5. Customizable Texture
Want super fine powder for baking? Or a coarser grind for rubs? You decide!
What You’ll Need
You don’t need fancy equipment. Here’s the basic list:
✔ Fresh garlic bulbs (as many as you want)
✔ Sharp knife (for peeling and slicing)
✔ Cutting board
✔ Baking sheet (if using an oven)
✔ Dehydrator (optional, but faster)
✔ Blender, spice grinder, or mortar & pestle
✔ Fine-mesh sieve (for removing chunks)
✔ Airtight glass jar (for storage)
(Pro Tip: If you love making spices at home, a dehydrator is a great investment!)
Do you want to know How to Make Garlic Aioli?
Step 1: Peel the Garlic (The Easy Way!)
Peeling garlic can be annoying, but here’s a super fast trick:
- Separate the cloves from the bulb.
- Place them in a jar, seal the lid, and shake hard for 10-15 seconds.
- The skins will loosen, making peeling a breeze!
(Alternative: Smash cloves lightly with the flat side of a knife—the peel comes right off.)
Step 2: Slice the Garlic Thinly
Thin slices dry faster and more evenly.
- Use a sharp knife to cut cloves into 1/8-inch thick pieces.
- A mandoline slicer works too, but be careful—garlic cloves are small and slippery!
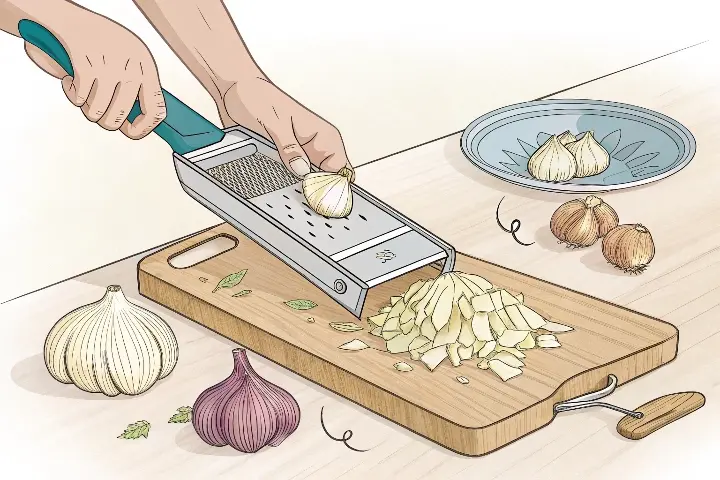
(Tip: Uniform slices = even drying. Avoid thick chunks—they take longer to dry.)
Step 3: Dry the Garlic (Oven vs. Dehydrator)
Method 1: Oven Drying (Most Common)
✅ Best for beginners (no extra equipment needed)
❌ Takes longer, uses more energy
Steps:
- Preheat oven to 150°F (65°C) (lowest setting).
- Spread garlic slices in a single layer on a baking sheet.
- Bake for 1.5 to 2 hours, stirring every 30 minutes.
- Garlic is ready when it snaps easily (not bends).
(Warning: Don’t rush by increasing heat—garlic will burn and taste bitter!)
Method 2: Dehydrator (Faster & More Efficient)
✅ Gentler drying = better flavor
✅ Hands-off process
Steps:
- Arrange garlic slices on dehydrator trays.
- Set temp to 125°F (52°C).
- Dry for 6-8 hours until completely crisp.
(Pro Tip: If you don’t have a dehydrator, try an air fryer on the lowest setting!)
Step 4: Grind into Powder
Once the garlic is bone-dry, it’s time to turn it into powder!
Option 1: Blender or Spice Grinder
- Works best for fine powder.
- Pulse in short bursts to avoid overheating.
Option 2: Mortar & Pestle
- Gives a slightly coarser texture.
- Great for small batches.
Option 3: Coffee Grinder (Dedicated for Spices)
- Fast and efficient.
- Just make sure it’s clean (no coffee residue!).
(Tip: Sieve the powder to remove big chunks, then re-grind them.)
Step 5: Storing Garlic Powder for Maximum Freshness
To keep your garlic powder flavorful for up to a year:
✔ Use an airtight glass jar (not plastic).
✔ Store in a cool, dark place (not near the stove).
✔ Label with the date (homemade lasts 6-12 months).
(Pro Tip: Add a few grains of uncooked rice to absorb moisture and prevent clumping!)
How to Use Homemade Garlic Powder
This stuff is versatile! Here are some delicious ways to use it:
1. Seasoning Meats & Veggies
- Sprinkle on chicken, steak, or roasted potatoes.
2. Homemade Spice Blends
- Mix with onion powder, paprika, and salt for a DIY seasoning.
3. Soups & Sauces
- Adds depth to ramen, chili, and pasta sauces.
4. Popcorn & Snacks
- Toss with buttered popcorn or nuts for extra flavor.
5. Baking (Yes, Really!)
- Adds a savory twist to garlic bread, biscuits, and crackers.
Common Mistakes to Avoid
🚫 Not drying garlic enough → Powder will clump and spoil.
🚫 Using high heat → Burns garlic, making it bitter.
🚫 Storing in plastic bags → Absorbs moisture and loses flavor.
🚫 Grinding when still warm → Creates steam, leading to clumping.
Advanced Tips for Perfect Garlic Powder
Now that you’ve mastered the basics, let’s take your garlic powder to the next level with these professional techniques:
Choosing the Best Garlic
- Freshness matters: Look for firm, plump bulbs with tight skin
- Seasonal tip: Garlic harvested in summer has stronger flavor
- Variety differences:
- Softneck garlic: Milder taste, longer shelf life
- Hardneck garlic: More complex, spicy flavor
Precision Slicing Techniques
For perfectly even drying:
- Use a Japanese mandoline for paper-thin slices
- Keep slices uniform 1/8-inch thickness
- Remove any green sprouts (they cause bitterness)
Alternative Drying Methods
Sun Drying (Traditional Method)
- Best for hot, dry climates
- Place slices on mesh screens in direct sunlight
- Cover with cheesecloth to protect from insects
- Takes 2-3 days of full sun
Air Fryer Method
- Set to lowest temperature (usually 150°F)
- Dry in batches for 1-1.5 hours
- Check frequently to prevent burning
Flavor Variations
Customize your garlic powder with these twists:
- Roasted garlic powder: Bake whole cloves at 350°F for 45 minutes first
- Smoked garlic powder: Cold smoke slices before drying
- Herb-infused: Mix with dried parsley or rosemary before grinding
Troubleshooting Common Problems
Even experienced makers encounter issues. Here’s how to fix them:
Problem: Powder Won’t Get Fine Enough
Solutions:
- Dry garlic longer – it should snap, not bend
- Use a coffee grinder instead of blender
- Sieve and re-grind coarse particles
Problem: Powder Turns Brown
Causes:
- Temperature too high during drying
- Garlic was old or starting to sprout
Fix: Start over with fresh garlic at lower temp
Problem: Powder Clumps in Storage
Prevention:
- Ensure complete cooling before storing
- Add 5-10 grains of raw rice to absorb moisture
- Use oxygen absorbers in storage jars
Creative Uses for Garlic Powder
Beyond basic seasoning, try these innovative applications:
In Baking
- Add 1/4 tsp to bread dough for depth
- Mix into biscuit or cracker recipes
- Enhance savory scones and muffins
DIY Spice Blends
- All-Purpose Seasoning:
- 3 parts garlic powder
- 2 parts onion powder
- 1 part black pepper
- 1 part paprika
- Meat Rub Base:
- Garlic powder
- Brown sugar
- Smoked paprika
- Cayenne pepper
Unexpected Uses
- Garlic salt: Mix 3:1 with sea salt
- Garlic oil: Infuse powder in warm olive oil
- Health tonic: Add pinch to honey for cold remedy
Scientific Benefits of Garlic Powder
Research shows homemade garlic powder retains more health benefits than commercial versions:
Nutritional Advantages
- Contains allicin (antibacterial compound)
- Higher concentration of antioxidants
- Preserves more vitamins B6 and C
Compared to Fresh Garlic
- Longer shelf life while maintaining benefits
- More convenient for daily use
- Gentler on digestion for some people
Large Batch Production
For those who want to make serious quantities:
Commercial-Grade Techniques
- Use food dehydrators with 10+ trays
- Industrial slicers for uniform cuts
- Powder mills for superfine texture
Cost Analysis
| Quantity | Store Price | Homemade Cost | Savings |
|---|---|---|---|
| 1 oz | $3.50 | $0.75 | 79% |
| 1 lb | $25 | $4 | 84% |
| 5 lbs | $100 | $15 | 85% |
FAQs (Most Googled Questions)
1. Can I use minced garlic instead of fresh cloves?
No—minced garlic has extra moisture and oils, making it hard to dry properly.
2. Why is my garlic powder turning brown?
You used too high heat! Always dry at low temps (125-150°F).
3. How long does homemade garlic powder last?
Up to 1 year if stored in an airtight container away from light and heat.
4. Can I make garlic salt at home?
Yes! Mix 3 parts garlic powder + 1 part salt.
5. Is homemade stronger than store-bought?
Yes! Freshly dried garlic has a much more intense flavor.
6. Can I use a microwave to dry garlic?
Yes, but it’s tricky. Microwave in 30-second bursts at 50% power until crisp.
7. What’s the best garlic for powder?
Any type works, but hardneck garlic has a stronger, spicier taste.
Final Thoughts
Now you know how to make garlic powder at home—easy, cheap, and way tastier than store-bought. Once you try it, you’ll never go back to the packaged stuff!
Want to take it further? Try making onion powder, chili powder, or smoked paprika the same way!
Got questions? Drop them in the comments—I’d love to help!

One thought on “How to Make Garlic Powder at Home – Easy DIY Guide”