


Friendship bracelets are more than just cute accessories—they’re symbols of love, memories, and creativity. Whether you’re making one for your best friend, a sibling, or yourself, the process is fun and rewarding.
In this complete guide, I’ll teach you multiple ways to make friendship bracelets—from classic string designs to beaded, personalized, and even loom-made bracelets. I’ll also share pro tips to make them look professional and last longer.
Let’s get started!
1. How to Make a Friendship Bracelet with String (Basic Method)
This is the easiest and most traditional way to make a friendship bracelet. You can create different patterns like stripes, zigzags, or diamonds.
Materials Needed:
- Embroidery floss (at least 3 colors)
- Scissors
- Tape or safety pin (to hold the bracelet in place)
Step-by-Step Instructions:
Step 1: Cut and Prepare the Strings
- Choose 4 to 6 strands of embroidery floss (each about 24 inches long).
- Tie them together in a knot at the top, leaving 2 inches for the bracelet’s closure.
Step 2: Secure the Bracelet
- Tape the knot to a flat surface or clip it to your pants with a safety pin. This keeps the bracelet steady while you work.
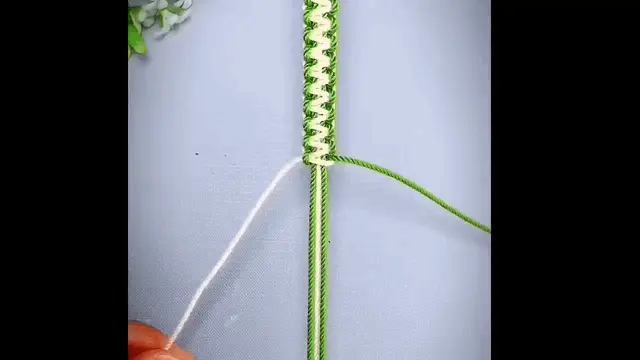
Step 3: Start Knotting (Forward Knot Method)
- Take the leftmost string (let’s say pink) and cross it over the next string (blue) to form a “4” shape.
- Pull the pink string under the blue one and up through the loop. Tighten gently.
- Repeat the same knot on the same strings one more time (this is called a double knot).
- Now, the pink string has moved to the right.
Step 4: Continue the Pattern
- Repeat the forward knot with the next string until the first color reaches the far right.
- Switch to the new leftmost string and repeat the process.
- Keep going until the bracelet is long enough to fit around a wrist.

Step 5: Finish the Bracelet
- Tie a final knot at the end.
- Trim any extra thread, leaving a small tail.
- To wear it, tie the two ends together around your wrist.
💡 Pro Tip: If you want a chevron pattern, arrange the strings symmetrically (e.g., pink, blue, yellow, yellow, blue, pink) and knot them toward the center.
2. How to Make a Friendship Bracelet with Beads
Beaded friendship bracelets look elegant and stylish. You can use seed beads, alphabet beads, or even small charms.
Materials Needed:
- Elastic cord or nylon thread
- Assorted beads
- Scissors
- A bead needle (optional, for tiny beads)
Step-by-Step Instructions:
Step 1: Measure Your Wrist
- Wrap the elastic cord around your wrist and add 1 extra inch before cutting.
Step 2: String the Beads
- Slide beads onto the cord in any pattern you like.
- For name bracelets, arrange letter beads first to spell out the word.
Step 3: Tie the Bracelet
- Once all beads are in place, tie the ends in a double or triple knot.
- Add a tiny drop of clear nail polish or glue to secure the knot.
- Trim excess thread carefully.

💡 Pro Tip: If the bracelet feels too tight, use stretch magic cord—it’s flexible and comfortable.
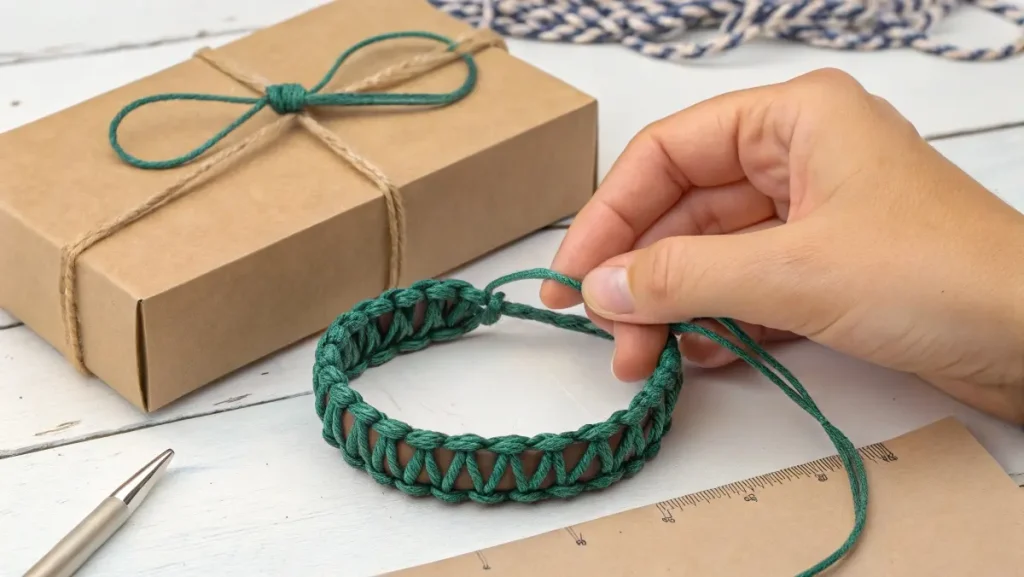
3. How to Make a Friendship Bracelet with Cardboard (No Tools Needed!)
Don’t have a clipboard or tape? No problem! A simple cardboard piece can work as a mini loom.
Materials Needed:
- A small cardboard square (about 4×4 inches)
- Embroidery floss
- Scissors
Step-by-Step Instructions:
Step 1: Prepare the Cardboard
- Cut small slits (about ½ inch deep) along the top and bottom edges of the cardboard.
Step 2: Secure the Strings
- Place the knotted end of your strings into one slit.
- Stretch the threads and tuck them into the opposite slits to keep them tight.
Step 3: Start Weaving
- Use the forward knot method (same as the string bracelet).
- The cardboard holds everything in place while you work.
Step 4: Remove and Finish
- Once the bracelet is long enough, carefully lift it off the cardboard.
- Tie the ends together.
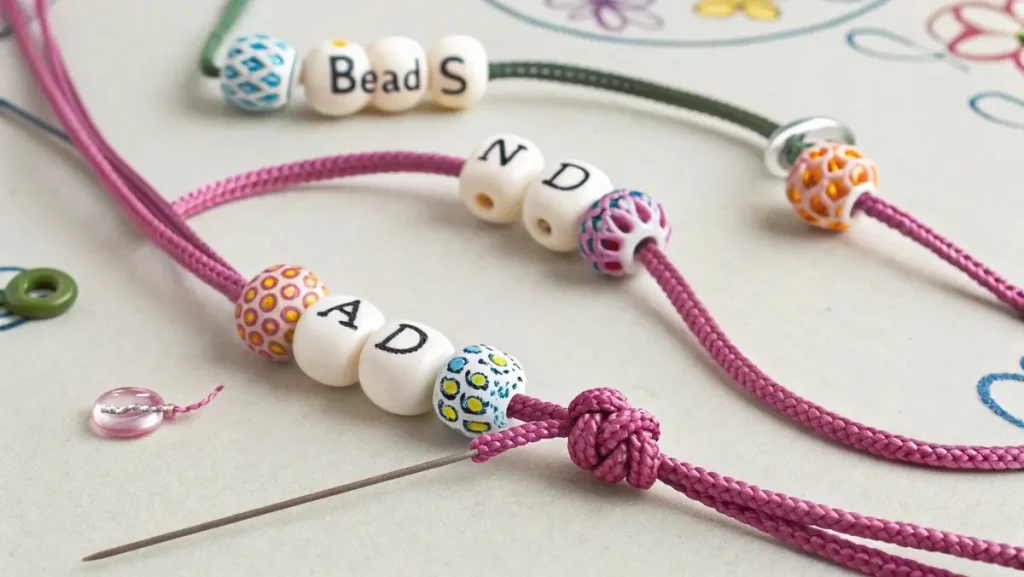
4. How to Make a Friendship Bracelet with Letters (Personalized Gift!)
Want to make a bracelet with a name or special word? Letter beads make it easy!
Materials Needed:
- Alphabet beads
- Stretchy string or fishing line
- Scissors
Step-by-Step Instructions:
- Choose Your Word (e.g., “BFF,” “Love,” or a friend’s name).
- Arrange the Beads on a flat surface before stringing them.
- Thread the Beads onto the string.
- Tie a Strong Knot and add glue for extra security.
💡 Pro Tip: Add small spacer beads between letters for a cleaner look.
Do you want to know How to Make a Paper Airplane?
5. How to Make a Friendship Bracelet with a Loom (For Advanced Patterns)
If you love detailed designs, a loom helps create intricate patterns like diamonds or flowers.
Materials Needed:
- Friendship bracelet loom (or make one with cardboard and pins)
- Embroidery floss
- A small hook or needle
Step-by-Step Instructions:
- Set Up the Loom – Secure the threads on the pegs.
- Follow a Pattern – Use online guides to knot threads in the right order.
- Remove Carefully – Once done, slide the bracelet off the loom.
- Tie the Ends – Secure with a knot and trim excess thread.
6. Tips for Making the Best Friendship Bracelets
✅ Use Bright Colors – They look more fun and vibrant.
✅ Keep Even Tension – Avoid loose or too-tight knots.
✅ Add Charms or Beads – Makes the bracelet unique.
✅ Start with Simple Patterns – Master basics before complex designs.
7. How to Make Friendship Bracelets Last Longer
🔹 Avoid Water – Threads can weaken when wet.
🔹 Double-Knot the Ends – Prevents unraveling.
🔹 Use Strong Thread – Nylon or embroidery floss works best.
FAQs – Most Common Questions
1. What’s the easiest friendship bracelet for beginners?
The two-string forward knot bracelet is the simplest.
2. How long does it take to make a friendship bracelet?
- Basic bracelet: 30 minutes
- Complex design: 1-2 hours
3. Can I wash my friendship bracelet?
No, water can loosen the knots.
4. How do I make a friendship bracelet tighter?
Untie the end, trim excess thread, and retie it.
5. What’s the best thread for friendship bracelets?
Embroidery floss—it’s colorful, strong, and easy to knot.
6. How do I tie a friendship bracelet by myself?
Use a safety pin to hold one end while tying.
7. What are some cool friendship bracelet patterns?
Try chevron, candy stripe, or heart designs!
Final Thoughts
Now you know multiple ways to make friendship bracelets—from simple strings to beaded and personalized designs. The best part? You can customize them however you like!