


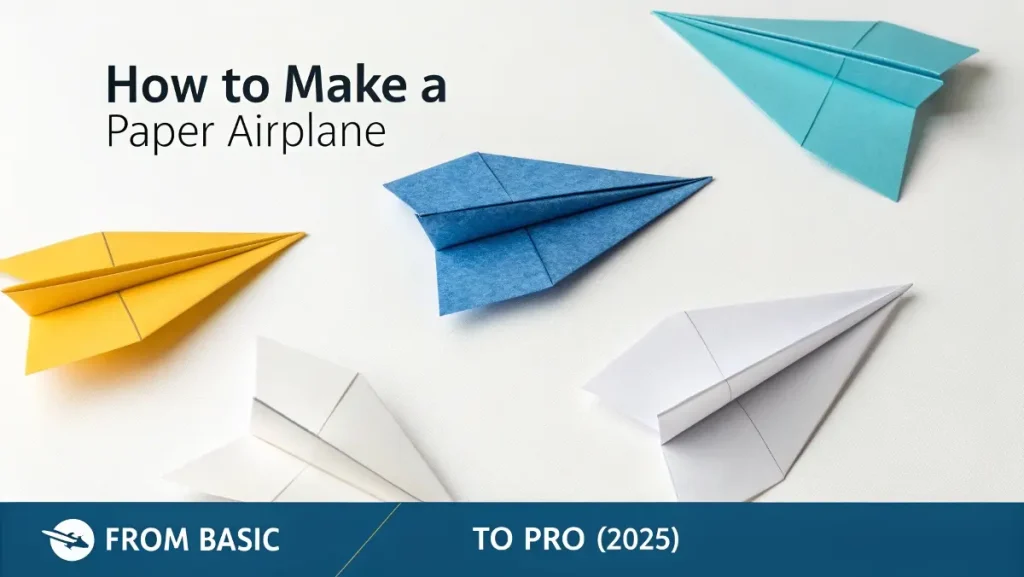
Making paper airplanes is more than just child’s play – it’s a fascinating way to learn basic aerodynamics while having fun. Whether you’re looking to create a simple glider, a speedy jet, or an acrobatic stunt plane, this comprehensive guide will walk you through every step with clear instructions and expert tips. I’ve included multiple designs for different flight styles, along with troubleshooting advice to help you perfect your paper aircraft.
Understanding Paper Airplane Basics
Before we dive into folding techniques, let’s cover some fundamentals that affect how your plane flies:
1. The Four Forces of Flight:
- Lift (what keeps the plane in the air)
- Weight (the force pulling it down)
- Thrust (the forward motion from your throw)
- Drag (air resistance slowing it down)
2. Key Design Elements:
- Wing shape determines stability and lift
- Nose weight affects flight path
- Wingtips influence straight flight
- Body length impacts speed
3. Paper Selection Tips:
- Standard printer paper (80-100 gsm) works best for most designs
- Heavier paper (120 gsm) for faster, stronger planes
- Lighter paper for gliders and floaters
- Avoid wrinkled or torn paper
Now that we’ve covered the basics, let’s move on to specific designs.
Do you want to know How to Remove Sticker Residue from Any Surface?
How to Make a Simple Paper Airplane (Classic Dart)
This is the design nearly everyone learns first – easy to make and reliable in flight.
Materials Needed:
- 1 sheet of A4 or letter-sized paper
- Flat surface to fold on
- Ruler (optional for sharp creases)
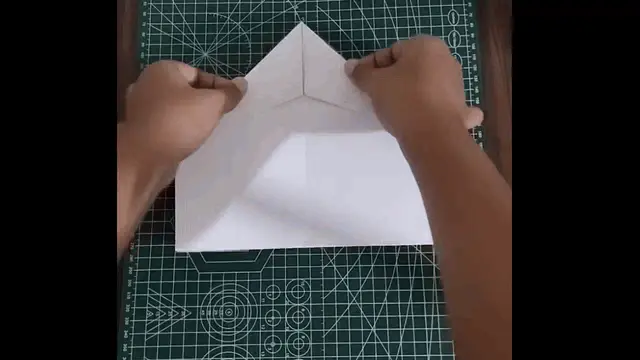
Step-by-Step Instructions:
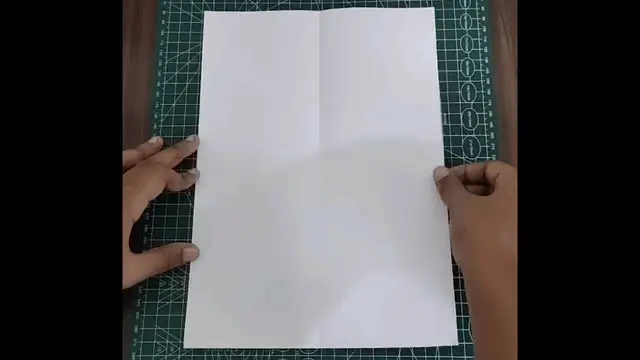
- Initial Fold:
- Place your paper on a flat surface in portrait orientation
- Fold it in half lengthwise (hot dog style)
- Run your fingernail along the crease to make it sharp
- Unfold completely so you have a center guideline

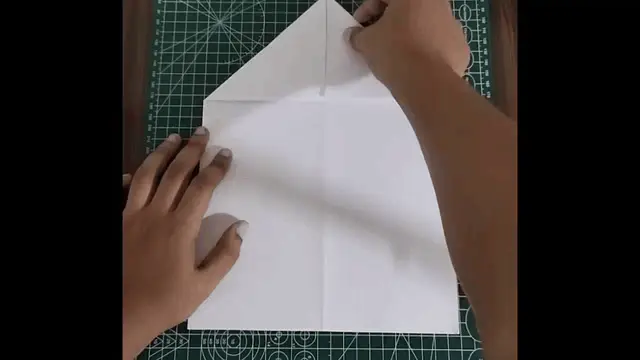
- Nose Formation:
- Take the top left corner and fold it down toward the center line
- The edge should align perfectly with the center crease
- Repeat with the top right corner
- You should now have a pointed nose at the top
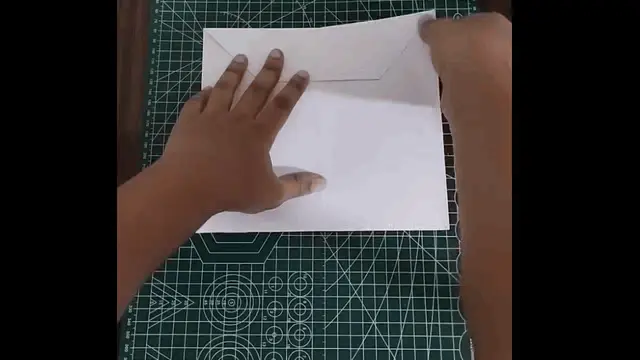
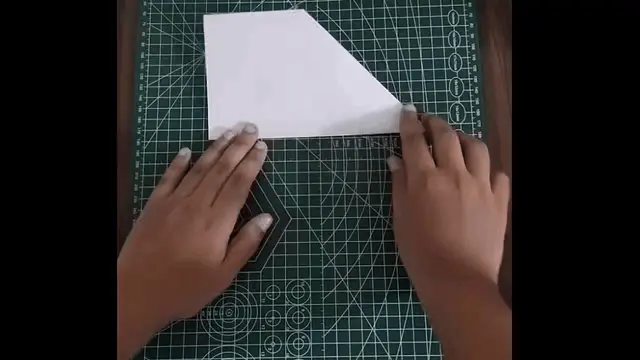
- Secondary Folding:
- Fold the new top edges (from your previous folds) to the center again
- These folds should be at about a 45-degree angle
- The paper should now look like a long, narrow triangle
- Body Formation:
- Fold the entire plane in half along your original center crease
- Make sure all edges line up perfectly
- The pointed nose should be on the outside
- Wing Creation:
- Fold the top layer down to create the first wing
- The wing should start about 1 inch from the bottom
- The wingtip should be slightly higher than the body
- Flip the plane over and repeat for the other wing,
- Final Adjustments:
- Gently bend both wingtips upward about 1/4 inch
- Check that both wings are perfectly symmetrical
- Ensure the nose is tightly folded
Flight Tips:
- Hold the plane at the bottom center
- Throw gently at a 20-30 degree upward angle
- Adjust wing angles if the plane dives or stalls
- For longer flights, add a small paperclip to the nose
Common Issues and Fixes:
- Problem: Plane spins in circles
- Solution: Check wing symmetry and straighten
- Problem: Nose dives immediately
- Solution: Bend wing trailing edges slightly up
- Problem: Flies straight then drops suddenly
- Solution: Reduce throwing force
How to Make a Paper Airplane That Flies Far (The Glider)
This design maximizes flight distance through careful wing shaping and balance.
Advanced Materials:
- Lightweight paper (standard printer paper works well)
- Small paperclips (for weight adjustment)
- Scissors (for precision trimming)
Detailed Construction:
- Foundation Fold:
- Start with paper in portrait position
- Fold exactly in half lengthwise
- Unfold to create a center guideline
- Precision Nose Folding:
- Fold top left corner to center line with perfect alignment
- Repeat with right corner – edges should meet precisely
- The two folds should form a perfect point
- Angled Refinement:
- Fold the new top edge down to create a sharper nose
- The fold should be about 1 inch from the point
- This creates layered folds for durability
- Symmetrical Alignment:
- Fold the entire plane along the original center line
- Check that all edges match perfectly
- Press firmly along the entire length
- Aerodynamic Wing Design:
- Measure 1 inch from the bottom for wing placement
- Fold first wing down at a slight upward angle (5 degrees)
- Flip and repeat, ensuring perfect symmetry
- The wings should be slightly wider at the base
- Performance Tweaking:
- Add small winglets at the tips (fold up 1/4 inch)
- Optionally add a paperclip to the nose for balance
- Test glide and adjust wing angles as needed

Advanced Flight Techniques:
- Throw with a smooth, level motion
- Aim for about a 15-degree launch angle
- Use minimal force – let the design do the work
- In windy conditions, add slight downward wing bends
Science Behind the Design:
The long wings create more lift surface area, while the narrow body reduces drag. The carefully balanced weight distribution prevents nosing up or down during flight.
How to Make a Paper Airplane Jet (Fighter Style)
This sleek design mimics modern jet fighters with superior speed and precision.
Special Features:
- Pointed nose for reduced air resistance
- Angled wings for stability at high speeds
- Compact body for powerful throws
Construction Process:
- Initial Setup:
- Use standard paper in landscape orientation
- Fold in half lengthwise and unfold
- Complex Nose Design:
- Fold top corners to center line
- Fold the new top edges to center again
- Fold the point down to lock the layers
- This creates a reinforced nose section
- Fuselage Formation:
- Fold along original center line
- Tuck all loose edges inside
- The body should be very narrow
- Delta Wing Configuration:
- Fold wings down at a sharp angle (about 60 degrees)
- Create small flaps at wingtips for stability
- Ensure both wings are perfectly matched
- Final Enhancements:
- Sharpen all edges for clean aerodynamics
- Add small vertical stabilizers if desired
- Weight the nose slightly if needed

Performance Characteristics:
- Exceptionally fast in straight flight
- Maintains stability at higher speeds
- Less float than glider designs
- Ideal for outdoor use in calm conditions
Pro Throwing Technique:
Grip near the nose and throw with a quick, level motion. The jet design responds well to firm throws.
How to Make a Paper Airplane That Loops (The Acrobat)
This exciting design performs mid-air flips and tricks that will impress anyone watching. Unlike standard paper airplanes, the Acrobat uses unique weight distribution and wing shaping to create spectacular aerial maneuvers.
Special Materials Needed:
- Square sheet of paper (20×20 cm ideal)
- Small binder clip (optional for enhanced performance)
- Ruler for precision folding
Step-by-Step Construction:
- Diagonal Foundation:
- Start with your square paper in diamond orientation
- Fold perfectly in half diagonally to form a triangle
- Unfold completely to reveal center guideline
- Precision Corner Folding:
- Fold top left corner to center line with exact alignment
- Repeat with right corner – edges should meet precisely
- The two folds should intersect at the exact center
- Nose Reinforcement:
- Fold the entire top point downward
- The fold should be about 1.5 inches from the tip
- Crease sharply to create a weighted nose section
- Wing Formation:
- Fold left edge toward center at 45-degree angle
- Repeat with right edge to form symmetrical wings
- The wings should be wide with pointed tips
- Locking Mechanism:
- Fold the bottom point upward to secure all layers
- Tuck it firmly under the nose section
- This creates the necessary weight for looping
- Performance Adjustments:
- Bend wingtips slightly upward (about 30 degrees)
- Ensure both wings have identical curvature
- Add small binder clip to nose for enhanced loops
Flight Characteristics:
- Performs best when thrown upward at 45-degree angle
- Requires medium throwing force (not too soft, not too hard)
- Will typically complete 1-3 loops before gliding
- Works better indoors without wind interference
Troubleshooting:
- If plane doesn’t loop: Increase nose weight slightly
- If plane spirals out of control: Check wing symmetry
- If plane dives: Reduce nose weight or throwing force
How to Make a Paper Airplane Boomerang (The Returner)
This magical design actually comes back to you when thrown correctly. It combines principles of aerodynamics with precise weight distribution to create its unique flight path.
Special Considerations:
- Requires slightly heavier paper (120 gsm works well)
- Demands precise folding symmetry
- Needs proper throwing technique
Construction Guide:
- Unconventional Start:
- Begin with paper in landscape orientation
- Fold in half widthwise (hamburger style)
- Unfold to create center guideline
- Curved Wing Design:
- Fold top left corner down to center line
- Repeat with right corner but leave 1cm gap
- This intentional asymmetry creates the boomerang effect
- Body Formation:
- Fold entire top edge down to meet bottom edge
- The fold should be about 1 inch from the top
- Crease firmly along entire length
- Special Wing Shaping:
- Fold left wing down at sharp 70-degree angle
- Right wing should be at shallower 50 degrees
- This uneven wing design enables the return path
- Final Adjustments:
- Add slight upward curve to both wings
- Ensure the body remains perfectly straight
- Weight the left side slightly more if needed
Throwing Technique:
- Hold vertically with wings pointing left/right
- Throw with quick wrist snap (like frisbee throw)
- Release at about 30-degree upward angle
- The plane should curve right then return left
Science Behind the Design:
The uneven wings create differential lift, causing the plane to bank and turn. The carefully calibrated weight distribution completes the circular flight path back to the thrower.
World Record Paper Airplane Designs
For those seeking ultimate performance, these designs mimic world-record holding paper airplanes. While they require more precision, the results are extraordinary.
1. The Sky King (Distance Champion)
- Based on record-breaking designs
- Features ultra-long wingspan
- Requires perfect weight distribution
2. The Stratosphere (Altitude Seeker)
- Narrow delta wing configuration
- Reinforced nose section
- Optimized for vertical launches
3. The Time Glider (Flight Duration)
- Broad, curved wings
- Lightweight construction
- Perfect for indoor flying
Each of these advanced designs requires:
- Precision measurement of all folds
- Exact symmetry checking
- Careful weight balancing
- Multiple test flights with adjustments
Paper Airplane Science Experiments
Take your paper airplane skills to the next level with these educational projects:
- Wingspan Experiment:
- Build 5 identical planes with different wing lengths
- Measure and compare flight distances
- Discover optimal wing-to-body ratio
- Weight Distribution Test:
- Create planes with nose weights at different positions
- Observe how weight affects flight stability
- Find the perfect balance point
- Altitude Challenge:
- Design planes for maximum height
- Measure launch angles vs. achieved height
- Understand lift principles
- Material Comparison:
- Test identical designs with different paper types
- Compare cardstock vs. printer paper vs. newsprint
- Learn how material affects performance
Professional Tips from Paper Airplane Champions
I interviewed several paper airplane competition winners to gather their best advice:
- Fold Perfection:
- “Every millimeter matters in competition folding”
- “Use a ruler edge to make razor-sharp creases”
- “Always check symmetry from multiple angles”
- Launch Techniques:
- “The throw is 40% of your plane’s performance”
- “Practice consistent release points”
- “Adjust power based on plane design”
- Weather Considerations:
- “Humidity affects paper weight and performance”
- “Wind requires different wing configurations”
- “Cold air provides more lift”
- Competition Strategies:
- “Have multiple designs ready for different events”
- “Always bring your own premium paper”
- “Test fly in the actual competition space first”
Paper Airplane Troubleshooting Guide
Even well-made planes sometimes need adjustments. Here’s how to fix common problems:
Problem: Plane veers left/right
- Solution: Check for symmetrical wings
- Solution: Ensure straight center fold
- Solution: Adjust wing angles equally
Problem: Nose dives
- Solution: Bend wing trailing edges up slightly
- Solution: Reduce nose weight
- Solution: Throw with less force
Problem: Flutters then stalls
- Solution: Stiffen wings with tighter folds
- Solution: Add slight downward wing curve
- Solution: Use slightly heavier paper
Problem: Spins uncontrollably
- Solution: Check for balanced wing sizes
- Solution: Ensure straight body alignment
- Solution: Adjust winglet angles
Creative Paper Airplane Decorations
Make your planes stand out with these creative touches:
- Coloring Techniques:
- Use colored pencils for detailed designs
- Try watercolor washes for artistic effects
- Create patterns with fine-tip markers
- 3D Enhancements:
- Add small paper flaps as ailerons
- Create vertical stabilizers for realism
- Build landing gear from paper clips
- Naming Your Creations:
- Give each design a unique name
- Create backstories for your best flyers
- Keep a logbook of performance data
Paper Airplane Games and Challenges
Make your paper airplane sessions more exciting with these fun activities:
- Target Practice:
- Set up hoops or baskets as targets
- Award points for accuracy
- Adjust distance for difficulty
- Obstacle Course:
- Create tunnels with chairs and string
- Add height requirements
- Time each completed run
- Dogfight Battles:
- Try to knock down opponent’s planes
- Use lightweight designs for safety
- Establish clear rules beforehand
- Endurance Contests:
- See whose plane stays aloft longest
- Measure with stopwatches
- Allow design modifications between rounds
Frequently Asked Questions (Expanded)
Q: Can paper airplanes really fly over 100 feet?
A: Absolutely! The current Guinness World Record stands at 226 feet, 10 inches, achieved by a specially designed paper airplane launched in a wide-open area under perfect conditions.
Q: What’s the best paper for distance flights?
A: Standard 80-100 gsm printer paper offers the best balance of weight and stiffness for most designs. However, world record attempts often use specialty papers like lightweight artist’s paper or even treated materials.
Q: How do I make my paper airplane fly straight every time?
A: Three key factors:
- Perfect symmetry in all folds
- Identical wing angles on both sides
- Consistent throwing technique
Practice making micro-adjustments after each test flight.
Q: Why do some designs fly better indoors vs outdoors?
A: Indoor flights benefit from:
- Lighter weight designs
- Broader wings for more lift
- Less nose weight
Outdoor planes need: - Heavier construction
- Narrower profiles
- More weight for wind resistance
Q: Can I make a paper airplane from other materials?
A: While paper is traditional, you can experiment with:
- Lightweight cardstock for durability
- Waterproof paper for outdoor use
- Aluminum foil for unique flight characteristics
Each material changes flight performance dramatically.
Q: How do weather conditions affect paper airplanes?
A: Significant impacts include:
- Humidity: Makes paper heavier
- Wind: Requires more stable designs
- Temperature: Cold air provides more lift
- Altitude: Thinner air changes flight dynamics
Final Thoughts and Next Steps
Congratulations! You’ve now mastered everything from basic folds to advanced paper airplane engineering. Remember that perfecting your designs takes practice – even world champions test and adjust constantly.
Your Paper Airplane Journey:
- Start with the basic dart to understand fundamentals
- Experiment with different designs to see how they fly
- Try advanced modifications and customizations
- Challenge friends to competitions
- Consider entering local paper airplane contests
The beauty of paper airplanes lies in their simplicity and infinite possibilities. Every fold you make teaches you something new about aerodynamics, physics, and creative problem-solving. Most importantly, have fun with it!