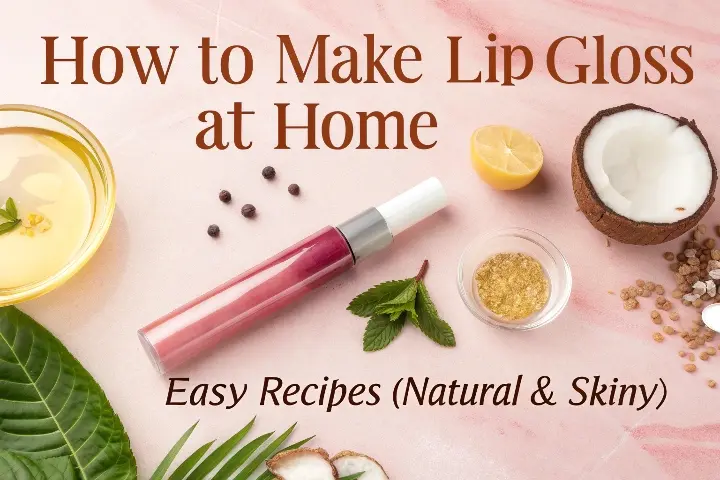
Everyone loves smooth, glossy lips, but store-bought lip glosses can be expensive and full of chemicals. The good news? You can easily make your own natural, customized lip gloss at home with just a few simple ingredients.
In this complete guide, I’ll show you step-by-step how to make different types of lip gloss—clear, tinted, glittery, and even flavored. I’ll also share pro tips to make sure your gloss turns out perfect every time. Plus, I’ve included a detailed FAQ section answering the most common questions people ask about DIY lip gloss.
Let’s dive in!
Why Should You Make Your Own Lip Gloss?
Before we get into the recipes, let’s talk about why homemade lip gloss is better than store-bought:
✔ No Harmful Chemicals – Most commercial lip glosses contain parabens, artificial fragrances, and synthetic dyes. DIY gloss lets you avoid these.
✔ Cheaper & Customizable – You control the ingredients, colors, and flavors. Want a vanilla-coconut gloss? Or a rosy pink tint? You decide!
✔ Perfect for Gifts – Homemade lip gloss makes a thoughtful, personalized gift for friends and family.
✔ Fun & Easy – You don’t need fancy skills—just a few basic kitchen tools.
What You Need to Make Lip Gloss
Essential Ingredients
- Oil Base – Makes the gloss smooth and shiny.
- Coconut oil (great for shine)
- Sweet almond oil (lightweight)
- Jojoba oil (similar to skin’s natural oils)
- Thickening Agent – Gives the gloss texture.
- Beeswax (most common)
- Shea butter (creamy texture)
- Candelilla wax (vegan alternative)
- Extra Moisturizers – Keeps lips soft.
- Vitamin E oil (prevents dryness)
- Honey (natural humectant)
- Flavor & Scent (Optional)
- Peppermint, vanilla, or strawberry essential oils
- Food-grade flavor oils (like LorAnn oils)
- Natural Colorants (For tinted gloss)
- Beetroot powder (pink/red)
- Cocoa powder (brown)
- Turmeric (light yellow)
- Edible glitter (for sparkle)
Tools You’ll Need
- Small glass bowl (for melting ingredients)
- Saucepan (for a double boiler setup)
- Spoon or spatula (for mixing)
- Small containers or empty lip gloss tubes
- Dropper (optional, for easy pouring)
Do you want to know How to Make Lip Scrub?
3 Simple DIY Lip Gloss Recipes
1. Basic Clear Lip Gloss (Easiest Recipe!)
Perfect for beginners! This recipe gives a high-shine, moisturizing gloss with just 3 ingredients.
Ingredients:
- 2 tablespoons coconut oil
- 1 tablespoon beeswax pellets
- 5 drops vitamin E oil
Steps:
- Melt the oils – Fill a saucepan with 1 inch of water and place a glass bowl on top (double boiler method). Add coconut oil and beeswax.
- Stir until melted – Keep stirring until the mixture is smooth (about 3-5 minutes).
- Add vitamin E oil – This helps keep lips moisturized.
- Pour into containers – Use small jars or empty lip gloss tubes.
- Let it cool – It will thicken as it cools.

Pro Tips & Variations:
- For extra shine: Add 1/4 tsp of honey
- For a thinner consistency: Reduce beeswax to 2 tsp
- Storage: Keeps for 3-6 months in a cool, dry place
- Custom scents: Try vanilla, strawberry, or citrus essential oils
Tip: Add 2-3 drops of peppermint essential oil for a refreshing tingle!
2. Natural Tinted Lip Gloss (Pink or Brown)
Want a hint of color? This recipe uses natural dyes for a soft tint.
Ingredients:
- 2 tablespoons sweet almond oil
- 1 tablespoon shea butter
- 1 teaspoon beetroot powder (for pink) OR cocoa powder (for brown)
- 1 teaspoon honey
Steps:
- Melt almond oil & shea butter (double boiler method).
- Mix in colorant – Stir well to avoid clumps.
- Add honey – Makes the gloss extra glossy.
- Pour & cool – Store in small containers.
Color Customization Guide:
| Desired Shade | Natural Colorant Options |
|---|---|
| Soft Pink | Beetroot powder |
| Berry Tone | Hibiscus powder |
| Nude Brown | Cocoa powder |
| Coral | Paprika + beetroot mix |
Expert Advice:
- For sparkle: Mix in a pinch of edible gold dust
- For stain effect: Add 1/2 tsp alkanet root powder
- Fix separation: If oils separate after cooling, gently reheat and stir
Pro Tip: For a deeper color, add more beetroot/cocoa powder.
3. Sparkly Glitter Lip Gloss (Fun & Festive!)
Great for parties or gifts! This version adds edible glitter for a dazzling effect.
Ingredients:
- 2 tablespoons jojoba oil
- 1 tablespoon beeswax
- ½ teaspoon cosmetic-grade glitter
- 5 drops vanilla essential oil
Steps:
- Melt jojoba oil & beeswax.
- Stir in glitter (make sure it’s safe for lips!).
- Add vanilla oil for a sweet scent.
- Pour into tubes and let it set.
Glitter Safety 101:
✅ Safe: PET glitter, cosmetic-grade mica
❌ Never Use: Craft glitter, non-soluble glitter
Next-Level Variations:
- Galaxy Gloss: Swirl blue, purple, and silver glitters
- Birthday Cake: Mix rainbow glitter + vanilla cupcake fragrance
- Holiday Special: Gold glitter + peppermint oil
Troubleshooting Sparkle Issues:
- Glitter sinking? Add 1/4 tsp candelilla wax to thicken
- Too gritty? Use finer grade glitter (under 0.008mm)
- Fading sparkle? Store away from direct sunlight
Warning: Only use cosmetic-grade glitter—regular craft glitter is NOT safe for lips!
Advanced Lip Gloss Recipes & Techniques
Now that you’ve mastered the basics, let’s explore some professional-level lip gloss recipes and techniques to take your DIY skills to the next level!
4. Plumping Lip Gloss (Natural & Tingly)
Want that fuller lips look without harsh chemicals? This recipe uses natural ingredients to create a gentle plumping effect.
Ingredients:
- 2 tbsp coconut oil
- 1 tbsp beeswax
- ½ tsp cinnamon oil (or 1/4 tsp ground cinnamon)
- 5 drops peppermint essential oil
- 1 tsp vitamin E oil
Steps:
- Melt coconut oil and beeswax together
- Remove from heat and add cinnamon oil/ground cinnamon
- Mix in peppermint and vitamin E oils
- Pour into containers and let cool
Safety Note: Test on your hand first – some people are sensitive to cinnamon. If it burns too much, use less next time.
5. Long-Lasting Matte Lip Gloss
For those who love matte finishes that stay put:
Ingredients:
- 1 tbsp castor oil
- 1 tbsp candelilla wax
- 1 tsp arrowroot powder
- ½ tsp cocoa butter
- 1/8 tsp mica powder (for color)
Steps:
- Melt wax and cocoa butter first
- Add castor oil and stir well
- Mix arrowroot and mica powder in slowly
- Pour quickly before it thickens
Pro Tip: This sets fast, so work quickly and keep stirring as you pour!
Bonus: How to Fix Common Lip Gloss Problems
❌ Problem: My gloss is too hard.
✅ Fix: Add more oil next time (less beeswax).
❌ Problem: My gloss is too runny.
✅ Fix: Add a little more beeswax or shea butter.
❌ Problem: The color is uneven.
✅ Fix: Mix the powder with a tiny bit of oil first before adding.
Creative Variations to Try
- Coffee-Infused Gloss (Great natural brown tint)
- Steep 1 tsp coffee grounds in 2 tbsp oil for 24 hours, then strain
- Chocolate Mint Gloss
- Add ½ tsp cocoa powder + 5 drops peppermint oil
- Fruity Summer Gloss
- Use flavored vitamin E oils (like orange or strawberry)
- CBD Lip Gloss (For extra hydration)
- Add 1-2 drops CBD oil to any base recipe
Packaging & Presentation Ideas
Make your lip gloss look store-bought quality with these tips:
- Use mini jars with screw tops (available on Amazon)
- Try lip gloss tubes with doe-foot applicators
- Add custom labels with ingredients and date
- Create gift sets with multiple flavors
- Use colorful shrink wraps for a professional seal
Troubleshooting Guide
Having issues? Here’s how to fix them:
Problem: Gloss is too thick
Solution: Re-melt and add ½ tsp more oil
Problem: Ingredients separating
Solution: Use an immersion blender when mixing
Problem: Gloss has bubbles
Solution: Tap container gently after pouring
Problem: Color too light
Solution: Add more powder ¼ tsp at a time
Expert Tips for Perfect Gloss Every Time
- Temperature Matters – Don’t overheat ingredients (keep below 170°F)
- Layering Technique – For ombre effects, pour colors in layers
- Sanitation – Sterilize containers with rubbing alcohol first
- Shelf Life – Add rosemary extract as natural preservative
- Texture Testing – Dip a spoon in to check consistency before pouring
Business Potential: Selling Your Lip Gloss
Thinking of turning this hobby into income? Here’s what you need to know:
✔ Legal Requirements
- Check FDA cosmetic regulations
- Proper labeling (ingredients, weight, contact info)
- Business license in your state
✔ Pricing Strategy
- Calculate cost per unit
- Typical markup is 3-5x materials cost
- Consider wholesale vs retail pricing
✔ Marketing Tips
- Instagram/TikTok videos of making process
- Local craft fairs and markets
- Custom colors for weddings/events
- Eco-friendly packaging appeals to buyers
Seasonal Lip Gloss Ideas
Keep your products fresh all year:
Spring: Floral scents (rose, lavender)
Summer: Tropical flavors (coconut, pineapple)
Fall: Spiced tones (pumpkin, chai)
Winter: Peppermint with glitter
FAQs: Your Top Lip Gloss Questions Answered
1. Can I use Vaseline instead of beeswax?
Yes, but it won’t thicken the same way. Beeswax gives better texture.
2. How long does homemade lip gloss last?
About 3-6 months if stored in a cool, dry place.
3. Can I use food coloring in lip gloss?
Only cosmetic-grade or natural dyes (like beetroot powder). Regular food coloring may stain.
4. What’s the best oil for shiny lip gloss?
Coconut oil gives the most shine, but jojoba oil is great for a lighter feel.
5. Can I make matte lip gloss?
Yes! Use less oil and add a tiny bit of cornstarch.
6. Is homemade lip gloss safe for kids?
Yes, but avoid essential oils if they’re under 6 (can be irritating).
7. Can I sell my DIY lip gloss?
Check local laws—some places require FDA approval for selling cosmetics.
8. Why is my lip gloss sticky?
Too much honey or glycerin. Reduce the amount next time.
Final Thoughts
Making your own lip gloss is easy, fun, and rewarding. You get softer lips, avoid harmful chemicals, and save money. Plus, you can customize it exactly how you like!
Try these recipes, experiment with different oils and colors, and enjoy your perfect, personalized lip gloss.
Have questions? Drop them in the comments—I’d love to help! 😊
Happy gloss-making! 💋✨
One thought on “How to Make Lip Gloss at Home: Easy DIY Recipes (Natural & Shiny)”