


Tired of store-bought lip balms filled with chemicals and artificial ingredients? Want a natural, affordable, and customizable solution for dry, chapped lips? Making your own lip balm at home is easier than you think!
In this ultimate guide, I’ll walk you through how to make lip balm in different ways—with beeswax, without beeswax, and with Vaseline. Each method is simple, uses natural ingredients, and works wonders for keeping your lips soft and moisturized.
Plus, I’ll share pro tips, troubleshooting advice, and fun variations so you can create the perfect lip balm for your needs. Let’s dive in!
Why Make Your Own Lip Balm?
Before we get into the recipes, let’s talk about why DIY lip balm is a great idea:
✔ No Harmful Chemicals – Many commercial lip balms contain parabens, artificial fragrances, and drying alcohols. DIY versions use natural, skin-friendly ingredients.
✔ Customizable – You control what goes in it! Prefer peppermint? Add it! Want extra hydration? Boost it with shea butter or honey.
✔ Cost-Effective – Making lip balm at home is much cheaper than buying high-end natural brands.
✔ Fun & Creative – Great for gifts, parties, or just experimenting with different scents and textures.
Now, let’s get into the recipes!
Do you want to know How to Make Lip Gloss at Home?
How to Make Lip Balm with Beeswax
Beeswax is a classic lip balm ingredient because it locks in moisture, adds thickness, and gives a smooth glide. If you’re not vegan, this is one of the best ways to make long-lasting lip balm.
Ingredients You’ll Need:
- 2 tbsp beeswax pellets (or grated beeswax)
- 2 tbsp coconut oil (moisturizing)
- 1 tbsp shea butter (extra nourishment)
- 5-10 drops essential oil (like peppermint, vanilla, or lavender) – optional
- Small lip balm containers or tins (you can reuse old ones!)
Step-by-Step Instructions:
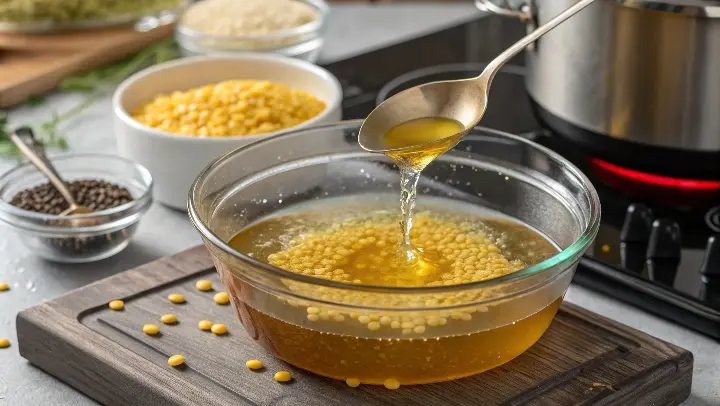
- Melt the beeswax – Use a double boiler (or a glass bowl over simmering water) to melt the beeswax pellets. Stir occasionally until fully melted.
- Add coconut oil & shea butter – Once the beeswax is liquid, stir in the coconut oil and shea butter until everything is smooth and well combined.
- Mix in essential oils (optional) – Remove from heat and add a few drops of your favorite essential oil for fragrance. Peppermint gives a refreshing tingle, while vanilla adds a sweet scent.
- Pour into containers – Quickly pour the mixture into small lip balm tubes or tins. Work fast—it hardens as it cools!
- Let it set – Wait 20-30 minutes until fully hardened. Don’t touch it while cooling to avoid fingerprints.

Pro Tips:
- If the balm is too hard, add more coconut oil next time.
- If it’s too soft, increase the beeswax slightly.
- For a tinted balm, add a pinch of beetroot powder or cocoa powder.
Why This Works:
- Beeswax forms a protective barrier to prevent moisture loss.
- Coconut oil deeply hydrates.
- Shea butter soothes and repairs dry lips.
How to Make Lip Balm Without Beeswax (Vegan Option)
Don’t use beeswax? No problem! Candelilla wax (from a plant) works just as well and is 100% vegan. Here’s how to make a cruelty-free lip balm.
Ingredients You’ll Need:
- 1 tbsp candelilla wax (or carnauba wax)
- 1 tbsp cocoa butter (for richness)
- 1 tbsp sweet almond oil (light and nourishing)
- 5 drops vitamin E oil (for extra healing)
- A few drops of essential oil (optional)
Step-by-Step Instructions:
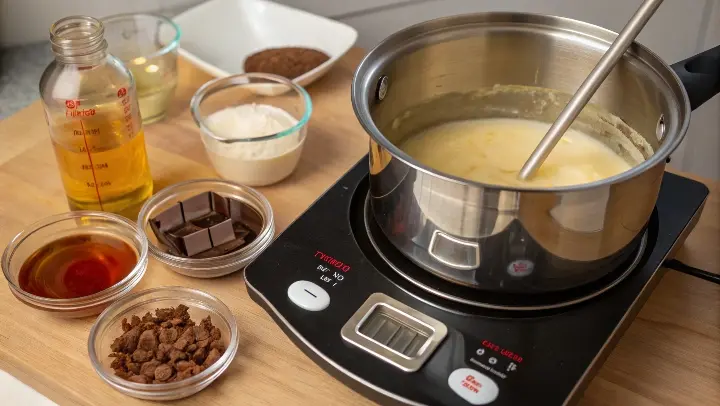
- Melt the candelilla wax – Use a double boiler to melt the wax gently. It melts faster than beeswax, so keep an eye on it.
- Add cocoa butter & almond oil – Stir until everything is fully blended.
- Mix in vitamin E & essential oils – Vitamin E boosts shelf life, and essential oils add a nice scent.
- Pour into containers & cool – Transfer to small jars and let it set for about 30 minutes.
Why This Works:
- Candelilla wax gives structure without beeswax.
- Cocoa butter makes it creamy and luxurious.
- Almond oil keeps lips soft without greasiness.
How to Make Lip Balm with Vaseline (Super Easy!)
If you want the simplest, no-melt method, Vaseline (petroleum jelly) is a great base. It’s already thick and moisturizing—just enhance it with a few extras!
Ingredients You’ll Need:
- 2 tbsp Vaseline
- 1 tsp coconut oil (or olive oil)
- ½ tsp honey (natural humectant)
- A few drops of essential oil (optional)
Step-by-Step Instructions:
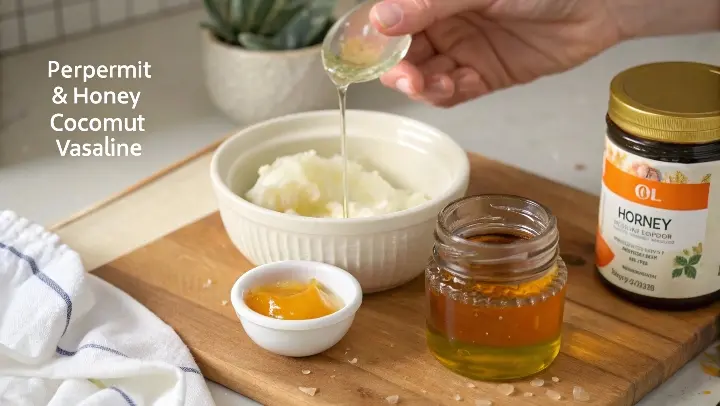
- Softening the Vaseline – Scoop Vaseline into a small bowl. If it’s too thick, warm it slightly (10 sec in the microwave).
- Mix in coconut oil & honey – Stir well until smooth.
- Add essential oils (optional) – For flavor, try peppermint or orange oil.
- Transfer to a container – Use a small jar or tin. No need to wait—it’s ready to use!
Why This Works:
- Vaseline locks in moisture like nothing else.
- Coconut oil & honey add extra hydration.
Troubleshooting Common Lip Balm Problems
❌ Too hard? → Add more oil (coconut, almond, or olive).
❌ Too soft? → Increase the wax (beeswax or candelilla).
❌ Grainy texture? → The butters may not have melted fully—reheat gently.
❌ Separating layers? → Stir well while cooling to prevent this.
Fun Variations to Try
✨ Tinted Lip Balm – Add a pinch of cocoa powder (for brown) or beetroot powder (for pink).
✨ Exfoliating Lip Balm – Mix in a tiny bit of sugar or coffee grounds.
✨ SPF Lip Balm – Add a bit of zinc oxide (non-nano) for sun protection.
Advanced Lip Balm Making Techniques
1. Layered Lip Balms
Create beautiful, multi-colored lip balms that look as good as they feel:
What You’ll Need:
- Two or three different colored batches (use natural colorants)
- Small pouring jug or syringe
- Patience!
How To Do It:
- Make your first colored layer and pour it into containers, filling about 1/3 of the way
- Let it cool completely (about 15 minutes)
- Make your second color and pour carefully over the first layer
- Repeat for additional layers
- Let set completely before using
Pro Tip: Slightly warm the top of the set layer with a hair dryer for better adhesion between layers.
2. Swirled Lip Balms
For a marbleized effect:
- Prepare two different colored batches
- Pour them simultaneously into containers
- Use a toothpick to gently swirl before they set
- Let cool completely
3. Lip Balm Sticks vs. Tins
- Tubes/Sticks: Best for firm formulas (higher wax content)
- Tins/Jars: Better for softer balms (higher oil content)
Conversion Tip: If your balm is too soft for tubes, add 1/2 tsp more wax. If too hard for tins, add 1/2 tsp more oil.
Specialty Ingredients to Elevate Your Lip Balm
1. Luxury Additives
- Mango Butter: Ultra-nourishing with a silky feel
- Sea Buckthorn Oil: Great for repairing damaged lips
- Rosehip Oil: Helps with lip discoloration
- Lanolin: Super hydrating (not vegan)
2. Natural Flavor Ideas
- Citrus Zest: Add grated orange/lemon zest while melting
- Cocoa Powder: For chocolate lovers
- Cinnamon Oil: Warming effect (use sparingly)
- Matcha Powder: Antioxidant boost with subtle green tint
3. Functional Additives
- Zinc Oxide (5-10%): For natural SPF protection
- Activated Charcoal: Gentle exfoliating properties
- Aloe Vera Gel: Soothing for sensitive lips
- Peppermint Extract: Plumping effect
Seasonal Lip Balm Variations
Summer Lip Balms
- Coconut Lime: 2 tbsp coconut oil + lime essential oil
- Aloe Mint: 1 tsp aloe gel + peppermint oil
- SPF Version: Add zinc oxide (5% of total volume)
Winter Lip Balms
- Vanilla Spice: Vanilla extract + pinch of cinnamon
- Honey Healing: Extra honey + chamomile oil
- Extra Protection: Higher wax content for wind protection
Holiday Specials
- Pumpkin Spice: Pumpkin seed oil + spice oils
- Candy Cane: Peppermint oil + crushed candy cane pieces
- Gingerbread: Molasses + ginger + cinnamon
Solving Common Lip Problems with DIY Balms
1. For Severely Chapped Lips
Recipe:
- 2 tbsp beeswax
- 1 tbsp shea butter
- 1 tbsp honey
- 1 tsp vitamin E oil
- 3 drops tea tree oil (antibacterial)
2. For Lip Discoloration
Recipe:
- 2 tbsp coconut oil
- 1 tbsp rosehip seed oil
- 1 tsp lemon juice (natural brightener)
- 5 drops lavender oil
3. For Aging Lips
Recipe:
- 1 tbsp beeswax
- 1 tbsp pomegranate seed oil
- 1 tbsp cocoa butter
- 5 drops frankincense oil
Packaging and Presentation Ideas
1. Eco-Friendly Options
- Bamboo Containers: Biodegradable and stylish
- Recycled Tins: Upcycle old mint tins
- Seed Paper Labels: Plantable labels that grow herbs
2. Gift Packaging
- Mini Sets: 3-5 small balms in different flavors
- Lip Balm Cubes: Pour into ice cube trays for fun shapes
- Personalized Labels: Handwritten or printed stickers
3. Storage Tips
- Keep away from direct sunlight
- Store in cool, dry places
- Use clean fingers or spatulas to prevent contamination
FAQs – How to Make Lip Balm
1. Can I use olive oil instead of coconut oil?
Yes, but coconut oil absorbs better. Olive oil can feel heavier.
2. How long does homemade lip balm last?
6-12 months if stored in a cool, dry place.
3. Can I make lip balm without wax?
Yes, but it won’t hold its shape well. Use a bit of butter (like shea or cocoa) for thickness.
4. Why is my lip balm melting in my pocket?
Too much oil or not enough wax. Try adjusting the ratio.
5. Can I use food flavoring instead of essential oils?
Yes, but use food-grade flavors (like those for candy-making).
6. Is Vaseline safe for lips?
Yes! It’s non-comedogenic and great for sealing in moisture.
7. Can I add color to my lip balm?
Yes! Use natural options like beet powder or mica (cosmetic-grade).
Final Thoughts
Now you know how to make lip balm in different ways—with beeswax, without beeswax, and with Vaseline. Each method is simple, customizable, and perfect for keeping your lips soft and healthy.
Which recipe will you try first? Let me know in the comments! And if you loved this guide, share it with your friends so they can make their own lip balm too. 😊
Your Turn to Create!
Now you have all the knowledge to become a lip balm-making expert! From basic recipes to advanced techniques, seasonal variations to therapeutic formulas, the possibilities are endless.
Which fancy variation will you try first? Maybe the layered rainbow balm for gifts? Or the SPF version for summer? Share your creations in the comments below!
Remember, the best lip balm is the one you make perfectly suited to your needs. Happy crafting, and enjoy your soft, healthy lips all year round! 💄✨
P.S. Don’t forget to pin this guide for later and share it with fellow DIY beauty enthusiasts!