

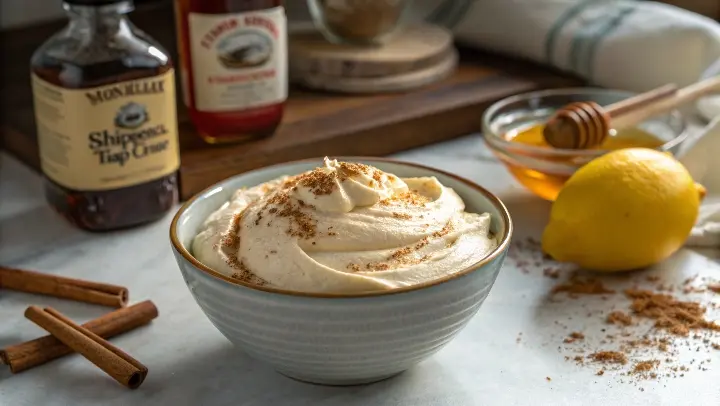
Whipped cream is the crowning glory of desserts, the perfect companion to your morning coffee, and a simple way to elevate fresh fruit. But what happens when you’re ready to whip up something delicious and realize – no heavy cream in the fridge? Don’t panic! This comprehensive guide will show you exactly how to make perfect whipped cream without heavy cream using ingredients you probably already have.
Whether you’re avoiding dairy, watching your fat intake, or simply ran out of heavy cream, we’ve got you covered with multiple foolproof methods. From coconut cream to evaporated milk to surprising vegan options, you’ll discover:
- 6 proven heavy cream substitutes that actually work
- Step-by-step instructions for each method
- Pro tips for perfect texture every time
- Troubleshooting common problems
- Storage and serving suggestions
- Answers to all your whipped cream questions
Let’s dive in and explore all the delicious possibilities!
Understanding Whipped Cream Science
Before we get to the substitutes, it helps to understand what makes whipped cream work. Traditional whipped cream is made by incorporating air into heavy cream, which contains at least 36% milk fat. The fat molecules stabilize the air bubbles, creating that light, fluffy texture we love.
When making whipped cream without heavy cream, we need alternatives that can:
- Hold air bubbles (through proteins or fats)
- Maintain structure when whipped
- Provide a creamy, pleasant texture
- Have a neutral or complementary flavor
The good news? Several ingredients meet these requirements beautifully!
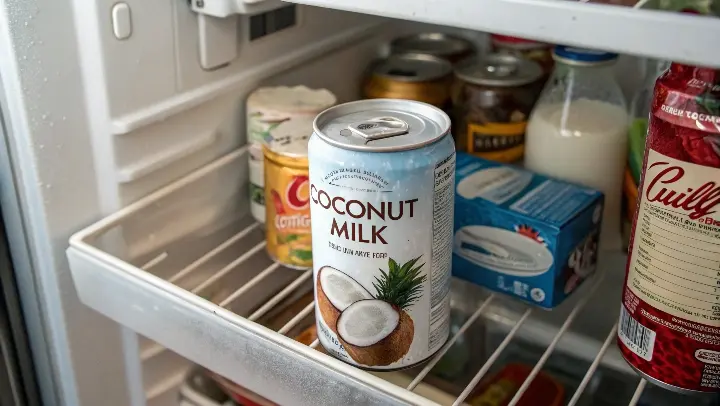
Method 1: Coconut Cream Whipped Cream (Dairy-Free & Vegan)
Why This Works Best for Dairy-Free Needs
Coconut cream has become the gold standard for dairy-free whipped toppings because it contains the high fat content needed to mimic traditional whipped cream. The natural fats in coconut cream trap air bubbles just like dairy fats do, creating an almost identical texture.
Why It Works
Coconut cream is thick, rich, and whips up just like dairy cream. It’s perfect for vegans, lactose-intolerant people, or anyone avoiding dairy.
Ingredients Needed
- 1 can full-fat coconut milk (chilled overnight)
- 1-2 tbsp powdered sugar (or maple syrup for vegan)
- 1 tsp vanilla extract (optional)
How to Make Whipped Cream Without Heavy Cream:
Step 1: Chill the Coconut Milk
- Place an unopened can of coconut milk in the fridge overnight.
- This separates the thick cream from the watery liquid.
Step 2: Scoop Out the Cream
- Open the can without shaking it.
- Scoop out the thick, solid cream from the top.
- Save the leftover liquid for smoothies (don’t waste it!).
Step 3: Whip the Cream
- Use a hand mixer or stand mixer to beat the cream for 1-2 minutes.
- Start slow, then increase speed until fluffy.

Step 4: Sweeten & Flavor
- Add sugar and vanilla (adjust sweetness to taste).
- Whip for another 30 seconds to mix well.
Step 5: Serve or Store
- Use immediately for best texture.
- If storing, keep in the fridge for up to 3 days.
Pro Tips for Success
✔ Use full-fat coconut milk (light coconut milk won’t work).
✔ Chill your mixing bowl for better whipping.
✔ Add 1 tsp cornstarch if the cream is too soft.
Choosing the Right Coconut Product
- Look for full-fat coconut milk or coconut cream in cans
- Avoid “light” coconut milk – it won’t whip properly
- Recommended brands: Thai Kitchen, Native Forest, Aroy-D
Preparation (The Night Before)
- Place 2-3 unopened cans in the refrigerator overnight
- This chilling separates the thick cream from the watery liquid
- For best results, chill your mixing bowl and beaters too
The Whipping Process
- Carefully open the chilled can without shaking
- Scoop out the solid cream that has risen to the top
- Reserve the coconut water for smoothies or cooking
- Using chilled beaters, whip the cream on medium speed for 1 minute
- Increase to high speed and whip until soft peaks form (2-3 minutes)
- Add sweeteners and flavorings (see options below)
- Whip for another 30 seconds to incorporate
Sweetening & Flavor Options
- Classic: 2 tbsp powdered sugar + 1 tsp vanilla
- Tropical: 1 tbsp honey + 1/2 tsp coconut extract
- Chocolate: 2 tbsp cocoa powder + 3 tbsp powdered sugar
- Citrus: 1 tbsp maple syrup + 1 tsp orange zest
Storage & Serving Tips
- Best used within 2 hours of whipping
- Can be refrigerated for up to 3 days (may need re-whipping)
- Not ideal for freezing (becomes grainy when thawed)
- Pairs beautifully with tropical fruits, chocolate desserts, and pies
Troubleshooting Coconut Cream
Problem: My coconut cream won’t thicken
Solution:
- Ensure you’re using full-fat coconut milk/cream
- The cream layer should be at least 1/2 inch thick after chilling
- Try adding 1/2 tsp arrowroot or cornstarch while whipping
Problem: It tastes too coconutty
Solution:
- Add stronger flavors like chocolate or espresso
- Use refined coconut products (they have less coconut flavor)
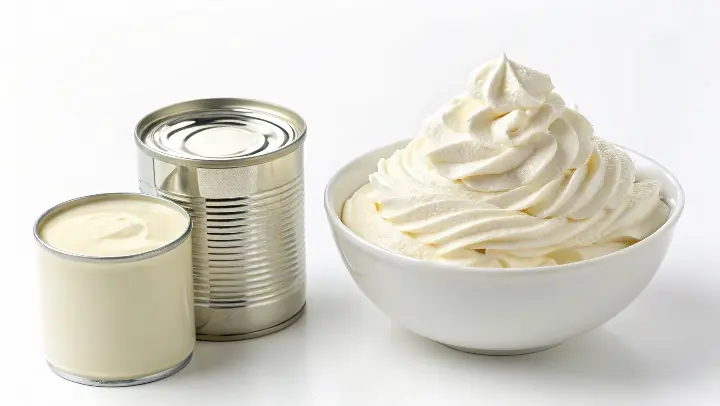
Method 2: Evaporated Milk Whipped Cream
The Science Behind This Method
Evaporated milk works because about 60% of the water has been removed, making it thicker than regular milk. When properly chilled, the milk proteins can trap air bubbles similarly to fat molecules in heavy cream.
Why It Works
Evaporated milk is thicker than regular milk and whips well when super cold.
Ingredients Needed
- 1 cup evaporated milk (chilled overnight)
- 2 tbsp powdered sugar
- 1 tsp vanilla extract
Step-by-Step Instructions
Step 1: Freeze the Bowl & Whisk
- Place your mixing bowl and whisk in the freezer for 10 minutes.
Step 2: Pour Cold Evaporated Milk
- Make sure the milk is ice-cold (warm milk won’t whip).
Step 3: Whip Until Thick
- Beat on high speed for 3-5 minutes until soft peaks form.
Step 4: Sweeten & Flavor
- Add sugar and vanilla, then whip for another 30 seconds.
Step 5: Use Immediately
- This version melts faster than regular whipped cream, so serve right away.
Pro Tips for Success
✔ Add 1 tsp gelatin (dissolved in hot water) for extra stability.
✔ Don’t overwhip – it can turn grainy.
Equipment & Ingredients
- 1 can (12 oz) evaporated milk (not sweetened condensed!)
- 2 tbsp powdered sugar
- 1 tsp vanilla extract
- 1/2 tsp unflavored gelatin (optional stabilizer)
- Electric mixer
- Metal mixing bowl
Preparation (Critical Step!)
- Place unopened can in freezer for 45 minutes
- Should be very cold but not frozen solid
- Freeze metal mixing bowl and beaters for 30 minutes
- If using gelatin:
- Bloom 1/2 tsp gelatin in 1 tbsp cold water
- Microwave for 5 seconds to dissolve
- Cool to room temperature
Whipping Process
- Pour cold evaporated milk into chilled bowl
- Whip on high speed for 1 minute
- Add sugar and vanilla
- Continue whipping until soft peaks form (3-5 minutes total)
- If using gelatin:
- Drizzle in dissolved gelatin while whipping
- Whip for additional 30 seconds
Pro Tips for Success
- Works best with full-fat evaporated milk
- Must use ice-cold milk and equipment
- Add gelatin for more stability (great for piping)
- Use immediately – doesn’t hold as long as dairy cream
Creative Variations
Mocha Whipped Cream:
- Add 1 tbsp instant espresso powder with the sugar
Cinnamon Spice:
- Mix in 1/2 tsp cinnamon + pinch of nutmeg
Lemon Cloud:
- Substitute vanilla with 1 tsp lemon zest + 1/2 tsp lemon extract
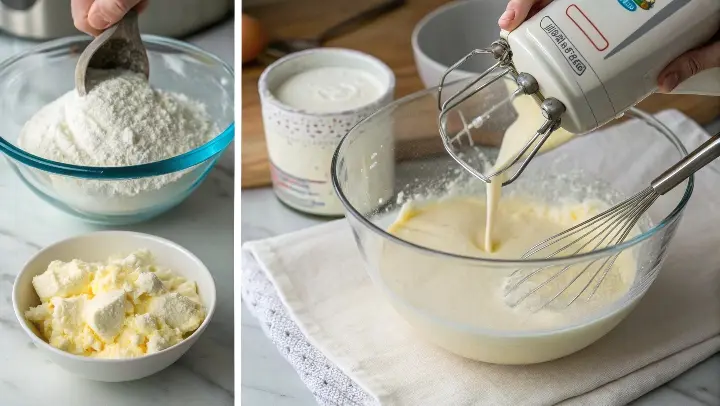
Method 3: Milk & Butter Whipped Cream (Homemade Heavy Cream Substitute)
How This Works
By combining whole milk (about 4% fat) with butter (80% fat), you create a mixture that approaches the fat content of heavy cream. This homemade “heavy cream” can then be whipped similarly to the real thing.
Why It Works
If you have whole milk and butter, you can make a homemade heavy cream substitute.
Ingredients Needed
- ⅔ cup whole milk
- ⅓ cup unsalted butter (softened)
- 1-2 tbsp powdered sugar
- 1 tsp vanilla extract
Step-by-Step Instructions
Step 1: Mix Milk & Butter
- Blend them together until smooth and fully combined.
Step 2: Chill for 30 Minutes
- Refrigerate to help it thicken before whipping.
Step 3: Whip Until Fluffy
- Use a hand mixer for 3-4 minutes until light and airy.
Step 4: Sweeten & Flavor
- Add sugar and vanilla, then mix well.
Step 5: Use Right Away
- Best for immediate use (doesn’t hold shape as long as real cream).
Perfecting the Ratio
The ideal ratio is:
- 2/3 cup whole milk
- 1/3 cup unsalted butter
This creates a mixture with about 30% fat – close enough to heavy cream to whip well
Step-by-Step Process
- Soften (don’t melt) the butter at room temperature
- Warm the milk slightly (about 10 seconds in microwave)
- Combine milk and butter in blender
- Blend on high for 30 seconds until fully emulsified
- Chill mixture for at least 2 hours (overnight is better)
- Whip chilled mixture with electric mixer:
- Start on low speed for 1 minute
- Increase to high and whip until soft peaks form (3-4 minutes)
- Add 2 tbsp powdered sugar and 1 tsp vanilla
- Whip for another 30 seconds to incorporate
Storage & Usage
- Best used within 4 hours
- Can be refrigerated overnight (may need re-whipping)
- Excellent for:
- Pancake topping
- Fruit salads
- Hot chocolate
Troubleshooting
Problem: Mixture won’t thicken
Solution:
- Ensure proper milk-to-butter ratio
- Make sure mixture is thoroughly chilled before whipping
- Try adding 1/4 tsp xanthan gum as stabilizer
Problem: Butter separates
Solution:
- Blend milk and butter more thoroughly
- Don’t let mixture get too warm during whipping
Method 4: Greek Yogurt Whipped Cream
Why This Works
Greek yogurt’s thick texture and protein content allow it to mimic some qualities of whipped cream, especially when lightened with a bit of milk. While not as airy as traditional whipped cream, it makes a delicious, protein-rich alternative.
Why It Works
Greek yogurt is thick and creamy, making a tangy whipped topping.
Ingredients Needed
- ½ cup full-fat Greek yogurt (chilled)
- ¼ cup cold milk
- 1-2 tbsp honey or sugar
- ½ tsp vanilla extract
Step-by-Step Instructions
Step 1: Mix Yogurt & Milk
- Blend until smooth.
Step 2: Whip Until Light
- Beat for 2-3 minutes until fluffy.
Step 3: Sweeten & Flavor
- Add honey and vanilla.
Step 4: Chill Before Serving
- Helps it thicken more.
Choosing Your Yogurt
- Must use full-fat Greek yogurt for best results
- Avoid flavored varieties (they’re often too sweet)
- Strain regular yogurt through cheesecloth for 1 hour to thicken if needed
The Whipping Process
- Chill yogurt and milk thoroughly
- Combine:
- 1 cup Greek yogurt
- 1/4 cup cold whole milk
- Whip with electric mixer for 2 minutes
- Add:
- 2 tbsp honey or powdered sugar
- 1 tsp vanilla extract
- Whip for another minute until light and fluffy
Flavor Variations
Berry Swirl:
- Fold in 2 tbsp berry puree after whipping
Lemon Curd:
- Mix in 2 tbsp lemon curd at the end
Maple Cinnamon:
- Substitute vanilla with 1 tbsp maple syrup + 1/2 tsp cinnamon
Best Uses
- Parfaits
- Pancake topping
- Fruit dips
- As a healthier dessert topping
Method 5: Silken Tofu Whipped Cream (Vegan)
The Science Behind Tofu Whipped Cream
Silken tofu’s smooth texture and high protein content allow it to be blended into a creamy consistency that resembles whipped cream when chilled. While it doesn’t incorporate air like traditional whipping methods, the final product is surprisingly light and versatile.
Why It Works
Silken tofu blends into a smooth, creamy texture, perfect for vegan desserts.
Ingredients Needed
- 12 oz silken tofu (drained)
- 2 tbsp maple syrup or sugar
- 1 tsp vanilla extract
- 1 tbsp lemon juice (optional for tang)
Step-by-Step Instructions
Step 1: Blend Tofu Until Smooth
- Use a food processor or blender.
Step 2: Add Sweetener & Flavor
- Mix well.
Step 3: Chill for 1 Hour
- Helps it set.
Step 4: Serve as Topping
- Great on pies, pancakes, or hot cocoa.
Choosing the Right Tofu
- Must use silken tofu (regular tofu won’t work)
- Mori-Nu brand works particularly well
- Firm or extra-firm silken tofu gives best texture
Step-by-Step Instructions
- Drain tofu but don’t press it
- Blend in food processor until completely smooth (2-3 minutes)
- Add:
- 3 tbsp maple syrup or powdered sugar
- 1 tsp vanilla extract
- Pinch of salt
- Continue blending until creamy
- Transfer to bowl and chill for at least 1 hour
Flavor Enhancements
Chocolate:
- Add 2 tbsp cocoa powder
Matcha Powder:
- Mix in 1 tsp matcha powder
Peanut Butter:
- Blend in 2 tbsp peanut butter
Serving Suggestions
- Vegan cheesecake topping
- Dairy-free mousse
- Pancake syrup alternative
- Fruit dip
Method 6: Aquafaba Whipped Cream (Chickpea Water)
The Magic of Aquafaba
Aquafaba (the liquid from canned chickpeas) contains proteins and starches that allow it to whip up similarly to egg whites. While not as creamy as fat-based whipped creams, it creates an incredibly light, foam-like topping that’s completely vegan.
Why It Works
The liquid from canned chickpeas (aquafaba) whips up like egg whites, making a light, vegan whipped cream.
Ingredients Needed
- ½ cup aquafaba (liquid from 1 can chickpeas)
- ¼ cup powdered sugar
- ½ tsp vanilla extract
Step-by-Step Instructions
Step 1: Strain the Aquafaba
- Drain chickpeas, save the liquid.
Step 2: Whip Until Stiff Peaks
- Beat for 5-7 minutes until fluffy.
Step 3: Sweeten & Flavor
- Add sugar and vanilla.
Step 4: Use Immediately
- Best for light, airy toppings.

Preparing the Aquafaba
- Drain liquid from 1 can of chickpeas (about 3/4 cup)
- Strain through fine mesh sieve to remove particles
- Reduce liquid by simmering to 1/2 cup for better whipping
Whipping Process
- Chill aquafaba for 30 minutes
- Whip on high speed for 5 minutes
- When soft peaks form, add:
- 1/4 cup powdered sugar
- 1/2 tsp cream of tartar (stabilizer)
- Continue whipping until stiff peaks form (3-5 more minutes)
Flavoring Options
- Vanilla bean paste
- Almond extract
- Instant coffee powder
Best Uses
- Vegan meringues
- Light dessert toppings
- Mousse bases
- Dairy-free macarons
Do you want to make whipped cream cheese?
Comparative Analysis of All Methods
| Method | Dairy-Free | Vegan | Texture | Stability | Best For |
|---|---|---|---|---|---|
| Coconut Cream | Yes | Yes | Very creamy | Good | Pies, fruits |
| Evaporated Milk | No | No | Light | Fair | Quick use |
| Milk+Butter | No | No | Creamy | Good | Pancakes |
| Greek Yogurt | No | No | Thick | Fair | Parfaits |
| Silken Tofu | Yes | Yes | Dense | Excellent | Vegan desserts |
| Aquafaba | Yes | Yes | Foamy | Good | Meringues |
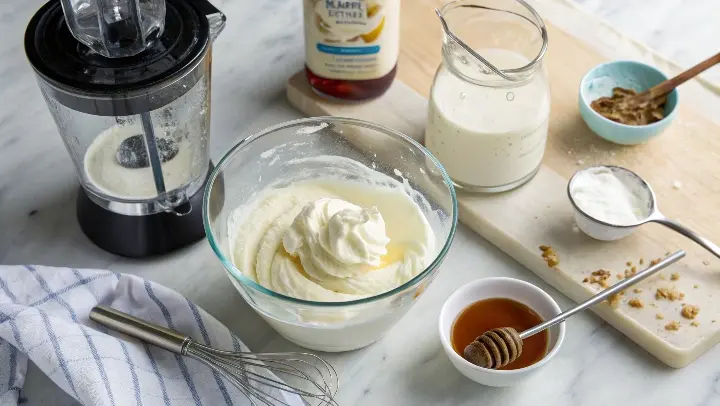
Expert Tips for Perfect Whipped Cream Every Time
- Temperature is Key
- Always chill your ingredients and equipment
- Metal bowls work best as they stay colder longer
- Sweetener Choices
- Powdered sugar incorporates best
- For liquid sweeteners, add slowly to avoid deflating
- Stabilizers for Longer-Lasting Cream
- 1/2 tsp gelatin (dissolved) per cup
- 1 tsp cornstarch
- 1/4 tsp xanthan gum
- Avoid Overwhipping
- Stop when soft peaks form
- Overwhipped cream becomes grainy
- Rescue Techniques
- For runny cream: Chill and rewhip
- For grainy cream: Fold in 1 tbsp fresh liquid
Creative Uses for Whipped Cream Alternatives
Dessert Applications
- Pie Toppings: Coconut cream works beautifully
- Trifles: Greek yogurt version adds tang
- Mousses: Silken tofu creates rich texture
- Parfaits: Layer with fruits and granola
Breakfast Ideas
- Pancake and waffle toppings
- French toast garnish
- Oatmeal swirl
Beverage Enhancements
- Hot chocolate float
- Coffee creamer
- Milkshake topping
Savory Applications
- Baked potato topper (Greek yogurt version)
- Soup garnish
- Vegetable dip base
Storage and Make-Ahead Tips
Refrigeration Guidelines
- Dairy-based: 1-2 days
- Coconut cream: 3-4 days
- Tofu-based: Up to 5 days
- Aquafaba: Best used immediately
Freezing Considerations
- Most alternatives don’t freeze well
- Coconut cream can be frozen but texture changes
- Silken tofu version freezes best
Reviving Stored Whipped Cream
- Give it a quick rewhip before serving
- For separated creams, fold gently to recombine
Frequently Asked Questions (Expanded)
1. Can I make whipped cream with almond milk?
While almond milk alone won’t whip, you can:
- Use it to make a cashew cream base (soak 1 cup cashews, blend with 1/4 cup almond milk)
- Combine with coconut oil (3 tbsp oil per cup milk, chilled)
2. What’s the healthiest alternative?
Greek yogurt version offers:
- High protein
- Probiotics
- Lower sugar option
3. Can I use these methods for piping decorations?
Best options for piping:
- Coconut cream with added stabilizer
- Milk+butter method
- Evaporated milk with gelatin
4. How do I make chocolate whipped cream?
For any method:
- Add 2 tbsp cocoa powder + 1 extra tbsp sugar
- Or fold in melted, cooled chocolate
5. Why does my whipped cream deflate?
Common causes:
- Underwhipped
- Overwhipped
- Warm environment
- Too much liquid added
6. Can I make whipped cream by hand?
Possible but challenging:
- Use a chilled metal bowl and wire whisk
- Expect to whisk vigorously for 10-15 minutes
- Best with coconut cream or milk+butter methods
7. What’s the best method for keto diets?
- Coconut cream with sugar substitute
- Heavy cream substitute using:
- 1/2 cup unsweetened almond milk
- 1/2 cup melted coconut oil
- Chill and whip as usual
Choosing Your Perfect Method
Now that you’ve explored all these fantastic alternatives, you’ll never be without whipped cream again! To recap:
- For vegan/dairy-free: Coconut cream is your best bet
- When you’re in a pinch: Evaporated milk works surprisingly well
- For a protein boost: Greek yogurt version delivers
- For baking needs: Milk+butter substitute mimics heavy cream best
- For ultra-light texture: Aquafaba creates magic
- For stable, make-ahead: Silken tofu holds up beautifully
Experiment with different methods to find your favorites. Remember, each alternative brings its own unique qualities – the “best” one depends on your specific needs and preferences.
Happy whipping! May all your desserts be crowned with fluffy, delicious goodness, heavy cream or not.
One thought on “6 Easy Ways to Make Whipped Cream Without Heavy Cream”